If you’ve ever come back from a two-day trip to find your tomato plants drooping like they’ve given up on life, you already know why a drip irrigation system for garden use is worth the trouble. I used to drag a hose around my balcony garden every single evening, and honestly, half the water ended up on the floor tiles instead of the soil. That’s when I finally sat down and installed a proper drip setup — and I wish I’d done it years earlier.
A drip irrigation system for garden beds or pots works by delivering water slowly, drop by drop, right at the root zone. No runoff, no guesswork, no soggy leaves inviting fungus. In 2026, with water bills in most Indian cities only going up, this isn’t just a convenience thing anymore — it’s genuinely practical.
Why Bother With Drip Irrigation At All?
Here’s the direct answer: a drip irrigation system for garden spaces cuts water usage by up to 50-60% compared to hand watering or sprinklers, because water goes exactly where roots need it instead of evaporating off leaves and paved surfaces.
Beyond the water savings, there’s the time factor. I don’t have thirty minutes every evening to stand around with a hose, and I’m guessing you don’t either. Once a drip system is set up, you’re looking at maybe ten minutes a week just checking for clogs or leaks.
There’s also the plant health angle. Overhead watering wets the leaves, and wet leaves are basically an invitation for fungal diseases — powdery mildew, leaf spot, that sort of thing. Drip lines keep foliage dry while the roots get exactly what they need.
What You’ll Need Before You Start
Don’t overthink this part. Most home garden kits available on Amazon India or at local nurseries cost somewhere between ₹800 and ₹3,000 depending on the size of your garden. Here’s a rough shopping list:
- A main supply line (usually 16mm polyethylene tubing)
- Drip emitters or micro-tubes (adjustable ones are worth the extra ₹50-100)
- A pressure regulator, especially if you’re on municipal water supply
- A filter — this one gets skipped a lot, and it shouldn’t
- Stakes to hold the tubing in place
- Connectors, T-joints, and end caps
Picture a small terrace garden in Jaipur with maybe 15-20 pots — that setup would need roughly 20 meters of tubing and about 25 emitters, give or take a few depending on spacing.
Mapping Out Your Garden Layout
Grab a notebook, or honestly just use your phone, and sketch where your plants are. This step matters more than people think.
Group plants with similar water needs together. Succulents and herbs like rosemary don’t want the same watering schedule as a tomato plant or a hydrangea bush. Mixing them on one line means somebody’s always unhappy — either the succulent is drowning or the tomato is thirsty.
[link to related guide about grouping plants by water needs here]
Measure the distance from your water source to the farthest point in your garden. This tells you how much main tubing to buy, and trust me, buying a little extra is smarter than making a second trip to the nursery.
Installing the Main Water Line
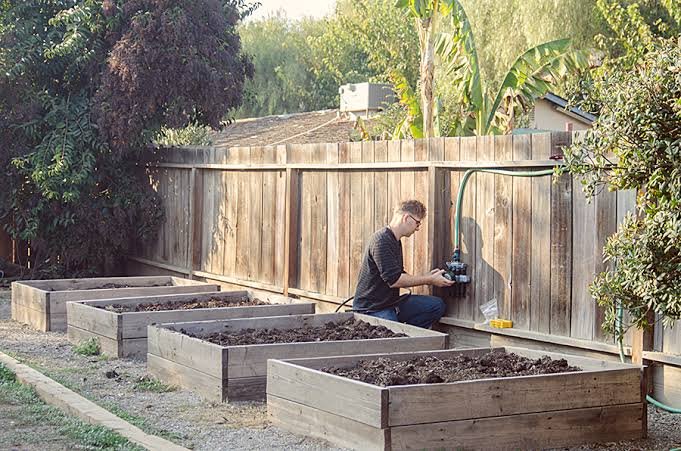
Connect the pressure regulator directly to your tap or water source. Skip this step and you risk blowing out your emitters the first time the pressure spikes — I learned that one the hard way with a burst connector that soaked my study table.
Run the main 16mm tubing along the length of your garden bed or across your pots. Keep it as straight as you can, though a few gentle curves around obstacles are fine.
Secure it with stakes every couple of feet so wind or curious pets don’t drag it out of place.
Adding Emitters and Drip Lines
This is where a drip irrigation system for garden setup gets its precision. Punch small holes in the main line wherever a plant sits, then insert the emitters.
For pots, one emitter per small pot usually does the job. Bigger pots or raised beds might need two or three spaced around the root zone.
- Adjustable emitters let you control flow from 0 to 8 liters per hour
- Fixed emitters are cheaper but less flexible
- Micro-sprayers work better for densely packed flower beds
Has this ever happened to you — one plant gets flooded while its neighbor stays bone dry? That’s usually an emitter placement issue, not a system failure. Small adjustments fix it fast.
Setting Up a Timer (Optional But Recommended)
You can absolutely run this manually by turning a tap on and off. I did that for the first month. But a basic mechanical timer, which runs around ₹500-1500, takes the guesswork out completely.
Set it for early morning, somewhere around 6-7 AM, before the sun gets harsh. This gives water time to soak in before evaporation kicks up.
Smart Wi-Fi timers exist too, and they’re nice if you travel often, but for most home gardens a simple mechanical one is more than enough.
Testing and Adjusting Your System
Turn the water on and walk the length of your garden. Check every single emitter — are they dripping evenly? Any spot with a puddle forming means that emitter’s flow is too high or there’s a blockage nearby.
[link to related guide about common irrigation troubleshooting here]
Give it a few days before making major changes. Plants take a little time to adjust to a new watering rhythm, and so will you, honestly.
Maintaining Your Drip Irrigation System
A drip irrigation system for garden use isn’t a “set it and forget it” thing, whatever some sellers might tell you. Clean the filter every 2-3 weeks, more often if your water supply has a lot of sediment.
Check for clogged emitters monthly — hard water deposits are a real problem in many parts of India. A simple soak in vinegar solution clears most mineral buildup.
Inspect tubing for cracks before summer, when UV exposure is at its worst. Cheap tubing tends to get brittle after a year or two in direct sun, so budget for eventual replacement.
FAQ
Does drip irrigation work for potted plants on a balcony? Yes, and honestly it’s one of the best use cases. Balcony gardens with 10-30 pots benefit hugely since watering by hand daily gets tedious fast, and drip lines fit neatly around pot arrangements.
How long should I run my drip irrigation system each day? It depends on soil type and plant needs, but most home gardens do fine with 20-30 minutes daily, or every other day for established plants with deeper root systems.
Can I use drip irrigation with a water tank instead of a tap? Yes, as long as the tank is elevated enough to create gravity pressure, or you add a small pump. Ground-level tanks usually need a pump for the system to function properly.
Will drip irrigation save money on my water bill? Most households see a noticeable drop, often 40-50%, within the first couple of months, since there’s almost no water wasted on runoff or evaporation compared to hose watering.
Is drip irrigation suitable for vegetable gardens? Absolutely — tomatoes, chillies, and leafy greens all respond well since consistent moisture at the root zone reduces blossom end rot and other stress-related issues.
How often should I replace the tubing? Good quality tubing lasts 3-5 years, but cheaper varieties exposed to harsh summer sun might need replacing after just 1-2 years.
Wrapping Up
Setting up a drip irrigation system for garden spaces isn’t complicated once you break it into steps — map your layout, lay the main line, add emitters, test, and maintain. It takes a weekend to install and saves you hours every month after that.
If your plants have been struggling with inconsistent watering, or your water bills feel a bit out of hand, this is genuinely one of the better garden investments you can make in 2026. Start small with one bed or a row of pots, see how it goes, and expand from there once you’ve got the hang of it.